Pages

Showing posts with label Christmas. Show all posts

Friday, December 20, 2013

Christmas DIYs of the Past

Just in case you're like me and still need some Christmas decorations, here are some that I've done in the past! The embroidery hoop ornaments make cute gift toppers, and you could use the chalkboard ornament as a gift/gift tag! You can find even more DIYs here!!

I know it has been silent around here. I've been busy with super secret Christmas present making and attempting to get the decorating done around the house. I am in the process of making more ornaments, since this is the first year we have to decorate the entire tree. Usually, we stick it in a corner, but this year it is in front of our big window and it is sadly bare... We won't even talk about the tree we have in the den that just has lights on it!

Charlie

Thursday, December 12, 2013

Felt Poinsettia Wreath DIY

This was my fist attempt at making a wreath with such large flowers. I am really happy with how it turned out and I love the 3D effect.

To make one you will need:
Foam wreath (wrapped in yarn)
Felt
Glue gun
Scissors
Straight pins (the longer, the better)
Thick paper (to make leaf template)

To make the Center:
1. Cut a 1x12" piece of brown felt.
2. Fold it in half and glue the edge.
3. Make little cuts all the way down. Just don't cut all the way through.
4. Roll it up and glue in place.

Flower:
1. Trace and cut out petals.
2. Glue them around the base until they are as full as you like.
3. Trace and cut some leaves out of green felt.

Assembling the wreath:
Use the straight pins to secure the flowers and leaves in place. I don't glue them in place because I really dislike wrapping wreaths in yarn and I like the ability to re-use the base. Feel free to glue them in place if you like!

Hang it up and you're all done! If you make one, e-mail me a picture... I would love to feature what you have created!

Charlie

Thursday, December 20, 2012

Another Great Use for Chalkboard Paint!

You can use it to paint glass bulbs... didn't even use primer, and they turned out great! I did use the chalkboard spray paint for this, just to get a smoother finish.  

I thought I would stop by and share this little trick just incase you guys are still making things for Christmas like I am. Why is it such a mad dash every year?  I never learn!  

~Charlie

Tuesday, December 18, 2012

Embroidery Hoop Ornament DIY

We decided to put up two big trees this year, and well... we are a bit short on ornaments! That means it is time to get creative with what I've got!

What I used:
Small embroidery hoops (mine are 3inches, thrifted)
Felt (whatever you have on hand)
Ribbon
Rick Rack
Scissors
Glue (Aleene's tacky glue works great)

How I did it:

1. Cut squares from felt that are slightly bigger than the hoop.
2. Close the hoop around the felt to create an impression.
3. Use the impression as a guide to decorate.
4. Glue your design in place, unless using ribbon or rick rack (glue at the end if needed).
5. Tighten everything in your hoop. If you're using ribbon or rick rack, make sure it hangs over so you can pull it taut as well.
6. Cut off the excess as close to the hoop as possible.
7. Add a ribbon/yarn or hook to hang and you're done!
These could make really cute last minute gift additions!
~Charlie


Monday, December 17, 2012

Scalloped Cone Tree DIY

'Twas the week before Christmas, and I was still DIYing decorations for the house... This one is super simple!

What you will need:
Foam cone (any size)
Plain straight pins (flat head)
Felt 1/2 yard
Scissors
Round object (to trace for scallop edge)
Yard stick
Marker
Beads

1. Cut 1 inch to 1-1/2 inch strips from the longest edge of your felt. It took me about six strips, but I had a tall (14 inch) cone.
2. Trace the scallop onto the felt using your round object (I used a roll of washi-tape).
3. Cut out your strips.
4. Start wrapping at the bottom of the cone, placing pins in as you go.  Keep wrapping until you reach the top. You have to get a little creative here to get it to neatly cover the tip.
5. Randomly place your beads around, and use your pins to hold them in place.
6. You're done!
Are you still making things for the holidays? Please tell me I am not alone!  You can find Christmas DIYs of the past here (including the sequin tree pictured above)!

~Charlie

Friday, December 14, 2012

Felt Ornament DIY Roundup


1. I love the simplicity of this ornament.  I have already made a couple! I used a scallop circle in place of a normal one.  You can find the DIY here.
2. The ladies at The Purl Bee have done it again.  These are just too cute! I am thinking they would make great additions to wrapping. You can find it here.
3. These vintage inspired felt ornaments stole my heart. You can find the how-to and a printable template here!

~Charlie

Friday, December 7, 2012

Crate & Barrel Inspired Christmas Tree Pillow DIY

I really was quite smitten with this pillow from Crate & Barrel, but I am allergic to feathers (and well, lets face it... for a seasonal pillow, its price was a bit steep!) SO... I figured out how to make something similar myself!

What you need:

12" pillow form
Red pillow cover: I used this tutorial to make my own using felt.
4 colors of green felt.
Scissors
Green thread and needle
An object to trace circles (about an inch and a half)
Glue gun

1. Cut out lots and lots of circles!
2. Group them in fours and stitch them together.
3. Cut a triangle out of some green felt (in the shape of your tree).
4. Glue the circle bunches down, creating the pattern until it is full.
5. Glue a rectangle for the trunk onto the back of the tree (triangle).
6. Glue the entire thing onto your pillow and you are done!

~Charlie

Monday, December 26, 2011

A Very Merry Christmas!

Happy belated Christmas, everyone!  I hope you had a wonderful time with family and friends.  Sorry for my silence over the past few days... I was enjoying all the Christmas activities!  Here is what the last few days have looked like from my phone!
Wrapped lots of gifts.... and we made everyone's name out of pipe cleaners, so much fun!

Drank way too much Egg Nog!

Snuggled with kitty!

Played with the Elf on a Shelf.... we still haven't decided on a name :).

I finished crocheting a blanket for a gift... hope they love it!

That's some of what we've been up to today!  Tonight is a sing-a-long... yep, we like to make Christmas stretch for the week! :)

~Charlie
All photos taken using vignette for android!

Thursday, December 15, 2011

Star Garland

While cleaning the crafty room, I found a very large bag of wooden stars (that I don't even remember purchasing... oooops!).
So... I thought, what could be more festive than star garlands?
How pretty... Now where to hang them?

If you want to make these, it's super easy! Paint your stars, add glitter if you like and use a glue gun to glue them to yarn or string... Done! 

~Charlie

Monday, December 20, 2010

Quick DIY Gift Ideas!!


Incase you forgot someone... or you really would like to add the handmade touch to an almost complete gift... here are some quick and easy ideas!!
Isn't this the cutest owl phone cozy by Elsie... I made one for myself and love it... it worked up quickly and I used scraps that I had on hand! YAY!

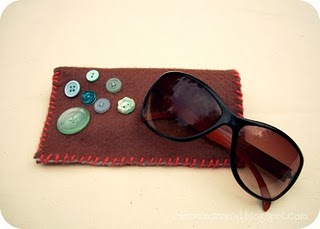
A fun sunglass case from this adorable blog that I love! She other amazing gift ideas too so you should be sure to check it out!

Who doesn't love headbands?? Learn how to make them here!!

Hope your holiday preparations are going well... I still have a mountain of yarn that is calling my name...   not to mention the wrapping that needs to be done! Is anyone completely done already??

~Charlie


Thursday, December 16, 2010

Holiday Placemat DIY

Here is a very very simple way to make a plain placemat into something festive!!  

What you need:
~Plain cotton placemats.
~Scrap felt.
~Embroidery floss.
~Tacky Glue.
~Scissors.
~Anything else that will make your vision come to life :)

Once you have your idea in mind, cut it out of felt.... I wanted to make a placemat with a border of old fashioned christmas lights.... But you can do anything!  Christmas trees, snowmen, ornaments, stars, candy canes.

After everything is cut, lay it out and pin it in place.  Then, glue it down using your tacky glue.  You can also sew your felt to the placemat with the embroidery floss if you like.  I was going for quick and easy so I glued!! :)

After you're done gluing or sewing you're all done!! (if you glued, let it dry:))

Hope you enjoy your pretty, festive table!! 
~Charlie

P.S. If you haven't entered the "little holiday giveaway" you should... it's open until midnight tonight!!!


Friday, December 10, 2010

Sweater remix DIY

Time to search for those sweaters we bought on sale that never really fit right, but we never returned.. or a favorite sweater that needs a little love to look like new again!  Let's make a somewhat cute sweater into an adorable cardigan!

1) Find said sweater.  Joi is helping me with this DIY and she picked this one!

2) Lay sweater flat and find the center.  If you're working with a v-neck this should be simple.  If you're not measure from the side seam in on both sides.  Pin down the center to ensure a straight cut.
(I am working with a yellow sweater of course!!)

3) Cut your sweater.  Make sure you use good sharp scissors so you don't get a lot of fraying.

4) Now you need to decide how you want to cover your cut lines... this is where you can get creative.  You can use ribbon... bias tape... make a ruffle.. add snaps.. possibilites are endless!  Joi decided to go with ribbon lining the inside to make it a little more stable, and she pinned it into place to sew.  Make sure you secure your ribbon properly as shown so that it doesn't slip as you're feeding it through the machine. 
**I went with extra wide quilt binding that I had laying around. (I forgot to picture my pinning process, sorry)!!

5) Sew it to your sweater using a coordinating thread.  We used a sewing machine but if you have more patience you can always do it by hand.


6) Add buttons or rosettes... make it fun!  Joi ended up adding buttons to pull the sweater in right at her natural waste.
To do this. a) put the sweater on and find you're natural waist while looking in a mirror.  Place a pin there.  b) measure down from the top of the sweater on both sides to make sure they line up. c) secure your button to one side and a small elastic hair tie to the other! done!

7) You're all done... now enjoy your new cardigan!!

Finished!! Mine didn't fit on the dress form, (ooops!) so I pinned it in place.. I didn't add a button to mine, but I think I may add a flower!! 


~Charlie

p.s. If anything is not clear... just ask :) and if you make one, let me know I'd love to see!!

Tuesday, December 7, 2010

Sequin Cone Tree DIY!!


I decided to take a cue from my grandma on this one.  When I was little, my grandmother gave my mom this little tree!!
It quickly became one of my favorite christmas decorations! Well since my mom is so nice, she gave it to me to decorate with for me and my husband's first Christmas together!!!  If you haven't noticed, it's a little worn and old... it no longer stands up straight from years of being played with!! So I thought I would make a new one... so this one can be kept safe!!

What you will need:
Foam cone (got mine at the dollar store)

 8mm Silver sequins (or another color works too)!

5mm Multi-color sequins or seed beads to add color (think lights)!

Applique pins or straight pins 3/4"

Now you're ready to start!  Just slide the pin though the hole in the sequins... and I found it easier to start at the top and work your way down.  
It's okay if a little bit of white shows through, as these are the spaces where you can put the mini color sequins!! Put in a movie and get comfy as this will take a little time, but I promise it is worth it!! when you're done it will look something like this! :)


I added a little star bead at the top!! 
I love the way it turned out... it reminds me of the beautiful vintage silver trees!! I can't wait to find a coffee table and make this part of the center piece!!

~Charlie

Wednesday, December 1, 2010

Make it a Handmade Holiday!


This year, with a new home and a bigger family I really want to make it a handmade holiday!!  So I thought I would share my ideas with you!! Once or twice a week (maybe more if I feel inspired) I will bring you some super cute ideas for home decor, recipes, gifts, and wardrobe! I am personally really excited about the wardrobe part.  My friend Joi and I love to look within our closets and figure out how we can make something new out of what we already own!! So we are going to share our secrets with you!! (pssst! Joi is an amazing seamstress.. she went to school for the super cool degree of fashion design)!!

So I start today with a really simple ornament idea... I figure better to start little :) Hope you enjoy!

What you need:
~Glass/plastic craft ornament that allows you to remove the top.
~Buttons that will fit through opening
~Ribbon/yarn/hook

1) Start with your empty clear ornament.
2) Remove the top.
3) Fill with buttons.
4) Tie on a ribbon.
5. Hang it on the tree and you're all done!!

I love these craft ornaments! You can fill them with whatever you want... or add glitter to the outside.. I have a glitter polka dot pattern in mind for my next one:)! Let me know if you try this out, I would love to see!!
~Charlie